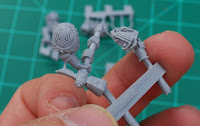
The other day I got a note from a client, who I had painted a couple of rhinos for, asking how I managed to make the graphic design so crisp and consistent. After writing up a lengthy response (and because I was working on some razorbacks for my Hawk Lords), I decided to make a brief tutorial on how I use masking tape to "make the magic happen".
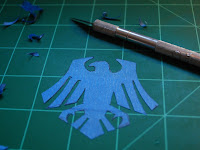
So basically, I find a design I like, and print it. Then I cut out the design and transfer it some masking tape.
I then cut out the design, making sure to peel it up so that the overlapping edges of the masking tape work to pull up the entire icon. If you don't lay down the tape this way, you'll be sorry. I then place it on the primed (white in this case) model as desired. Inevitably, I always tear something (damn! see the red circle), but it's pretty easy to make it match up on the model.
Once placed on the model, I make sure to push the tape down and get a
good, solid stick (usually using something rounded and small, but not so small
as to leave indentations). It's almost impossible to get it to stick
perfectly everywhere, but it's pretty easy to go back and touch it up
once you're done.
Obviously, the next step is to apply the second color to the masked model. For this one, I apply a liberal coat of black. Once I take the tape off, the areas where the paint crept under the tape are revealed (more red circles)
So out comes the withe paint, and I touch up the edges. Often it will take numerous coats, especially if you want smooth crisp colors (and are using watered down paints).
And lastly, I start adding watered down coats as needed for the overall design. The cool thing about it is that it goes quickly, and gives you some pretty consistent results, adding to the over all theme of the army.
Hope you found this useful. Here's what it looks like once I'm all done...


